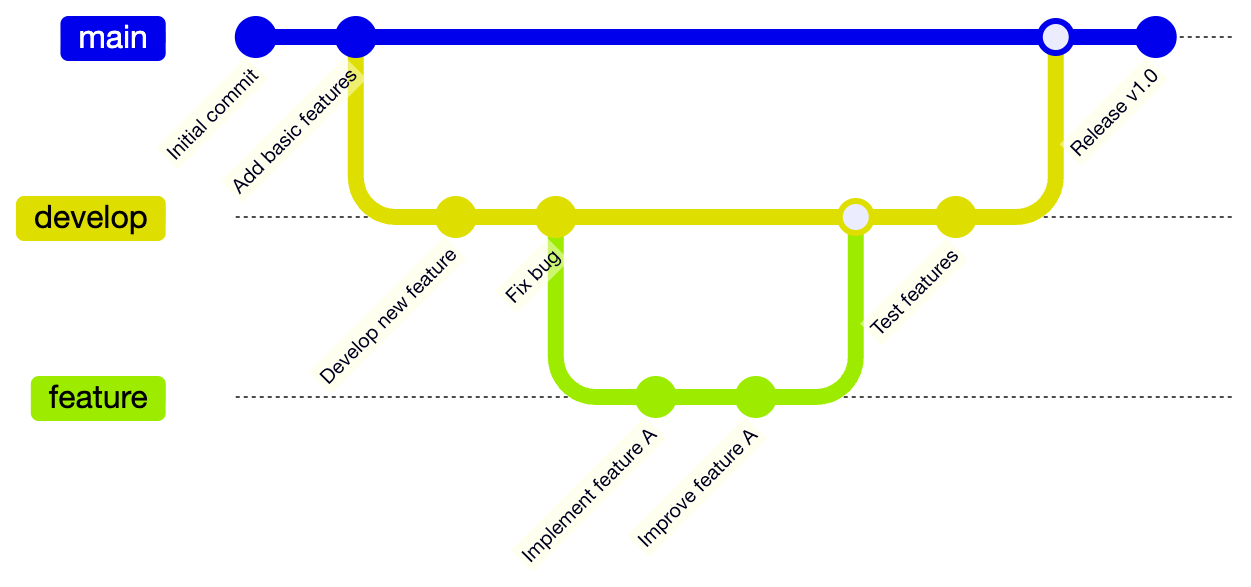
What You Will Learn
How to recognize when Gitgraph is the right Mermaid diagram, write the opening declaration, and shape a readable first version.
Best Fit
Release strategy documentation, Onboarding engineers, Incident branch timelines.
Start Here
Copy the starter example, replace labels with your domain language, then simplify anything that does not help the reader.
Syntax Basics
Start with the diagram declaration, then add the smallest set of labels, relationships, and annotations needed to communicate the idea.
- Use gitGraph as the declaration.
- Create commits with commit.
- Switch or create branches with branch and checkout.
- Use merge to show integration points.
Official Documentation Coverage
The Mermaid documentation for Gitgraph covers the following syntax areas. This tutorial condenses those topics into practical guidance for day-to-day documentation.
Custom commit ids
Custom commit ids is part of the official Mermaid Gitgraph syntax surface. Add it when the starter example needs more precision for production documentation.
Commit types
Commit types is part of the official Mermaid Gitgraph syntax surface. Add it when the starter example needs more precision for production documentation.
Tags
Tags is part of the official Mermaid Gitgraph syntax surface. Add it when the starter example needs more precision for production documentation.
Branches
Branches is part of the official Mermaid Gitgraph syntax surface. Add it when the starter example needs more precision for production documentation.
Checkout
Checkout is part of the official Mermaid Gitgraph syntax surface. Add it when the starter example needs more precision for production documentation.
Merge
Merge is part of the official Mermaid Gitgraph syntax surface. Add it when the starter example needs more precision for production documentation.
Cherry-pick
Cherry-pick is part of the official Mermaid Gitgraph syntax surface. Add it when the starter example needs more precision for production documentation.
Configuration options
Use Configuration options after the diagram communicates the right structure. Styling should improve scanning and emphasis without hiding the underlying Mermaid syntax.
How This Tutorial Uses The Official Docs
Mermaid syntax evolves, so the official page remains the primary reference. This tutorial turns that reference material into an authoring workflow, review checklist, and production guidance.
Start with the official grammar
The official Mermaid Gitgraph page is the source of truth for syntax changes. Use this tutorial to choose the right authoring pattern, then confirm exact keywords and edge cases in the official reference.
Prioritize the core sections
For the first pass, focus on Custom commit ids, Commit types, Tags, Branches. These sections usually explain the minimum structure required for a valid Gitgraph.
Add advanced syntax only when it earns its space
Treat Checkout, Merge, Cherry-pick, Configuration options as optional layers. They are valuable when the diagram needs precision, but they should not make the first version harder to read.
Syntax Reference Map
Use this map as a practical reading order for the official syntax page. It separates the first concepts to learn from the advanced details that are better added after the diagram already communicates the right idea.
Custom commit ids is part of the official Mermaid Gitgraph syntax surface. Add it when the starter example needs more precision for production documentation.
Does this custom commit ids detail make the gitgraph easier to understand or maintain?
Commit types is part of the official Mermaid Gitgraph syntax surface. Add it when the starter example needs more precision for production documentation.
Does this commit types detail make the gitgraph easier to understand or maintain?
Tags is part of the official Mermaid Gitgraph syntax surface. Add it when the starter example needs more precision for production documentation.
Does this tags detail make the gitgraph easier to understand or maintain?
Branches is part of the official Mermaid Gitgraph syntax surface. Add it when the starter example needs more precision for production documentation.
Does this branches detail make the gitgraph easier to understand or maintain?
Checkout is part of the official Mermaid Gitgraph syntax surface. Add it when the starter example needs more precision for production documentation.
Does this checkout detail make the gitgraph easier to understand or maintain?
Merge is part of the official Mermaid Gitgraph syntax surface. Add it when the starter example needs more precision for production documentation.
Does this merge detail make the gitgraph easier to understand or maintain?
Cherry-pick is part of the official Mermaid Gitgraph syntax surface. Add it when the starter example needs more precision for production documentation.
Does this cherry-pick detail make the gitgraph easier to understand or maintain?
Use Configuration options after the diagram communicates the right structure. Styling should improve scanning and emphasis without hiding the underlying Mermaid syntax.
Does this configuration options detail make the gitgraph easier to understand or maintain?
How To Study The Official Syntax
The official Mermaid page is broad because it documents the full parser surface. For a working tutorial, read it in passes instead of trying to memorize every option at once.
Skim the official Gitgraph documentation once to understand the full syntax surface before copying examples into production docs.
Focus first on Custom commit ids, Commit types, Tags, Branches, Checkout because these topics usually explain the core authoring model.
After the first diagram renders, revisit the official styling, configuration, and advanced sections only when the diagram needs that extra precision.
Authoring Workflow
This workflow turns the official syntax reference into a repeatable writing process for docs, specs, and product pages.
Frame the reader question
Before writing syntax, decide what question the Gitgraph should answer. Good diagrams usually answer one question clearly instead of answering several partially.
Draft the smallest valid diagram
Start with the declaration for gitGraph, add only the required elements, and render it before introducing advanced styling or configuration.
Add semantic labels
Replace placeholder names with business or system language that readers already know. Labels should reduce explanation work.
Review for maintenance
Remove details that are likely to drift quickly. If a value, date, or dependency changes often, explain who owns the update.
Quick Syntax Cheat Sheet
Use this compact reference when you already know the goal and need to write a valid Mermaid Gitgraph quickly.
gitGraphStart the code block with gitGraph so Mermaid selects the Gitgraph renderer.
Use gitGraph as the declaration.Add the smallest number of statements that express the main idea before adding visual polish.
Connect the meaningful elementsUse connections only where they explain ownership, sequence, flow, dependency, or hierarchy.
Custom commit idsUse official syntax topics as optional layers, not as requirements for every diagram.
Practice Prompts
Use these prompts after reading the official syntax sections. They force the diagram to stay practical instead of becoming a syntax inventory.
Create a Gitgraph for release strategy documentation using no more than eight visible elements.
Rewrite the starter example with labels from your own product or engineering domain, then remove any line that does not change the reader's understanding.
Add one official syntax feature from Custom commit ids, Commit types, Tags and explain why that feature makes the diagram clearer.
Compare the result with timeline and gantt and write one sentence explaining why Gitgraph is still the better fit.
Examples
Copy the example into the Mermaid editor, then adjust labels and relationships for your own documentation.
Feature Branch Workflow
A compact Git flow with one feature branch.
gitGraph
  commit id: "init"
  branch feature
  checkout feature
  commit id: "work"
  checkout main
  commit id: "hotfix"
  merge feature
Example Walkthrough
Read Mermaid examples from top to bottom. The first meaningful line usually selects the diagram parser; the following lines add labels, relationships, values, states, or layout hints.
gitGraphThis line declares the Mermaid diagram type, which tells Mermaid which parser and renderer to use.
commit id: "init"This line adds a relationship, transition, message, data value, or visual item to the diagram.
branch featureThis line contributes a label, item, or nested detail that Mermaid places into the diagram.
checkout featureThis line contributes a label, item, or nested detail that Mermaid places into the diagram.
commit id: "work"This line adds a relationship, transition, message, data value, or visual item to the diagram.
checkout mainThis line contributes a label, item, or nested detail that Mermaid places into the diagram.
commit id: "hotfix"This line adds a relationship, transition, message, data value, or visual item to the diagram.
merge featureThis line contributes a label, item, or nested detail that Mermaid places into the diagram.
When To Use Gitgraph
Diagram Choice Guide
A strong Mermaid tutorial should also explain when not to use the diagram type. Use this guide before adding a Gitgraph to a public page or technical design document.
Use this diagram when
Gitgraph works best for release strategy documentation, onboarding engineers, incident branch timelines. It should make the reader's next decision easier, not merely decorate the page.
Choose a different diagram when
Your main question is better answered by another structure, such as timeline, gantt, flowchart. For example, use a sequence diagram for message order and a flowchart for branching process logic.
Keep it maintainable by
Keeping the first version small, naming every important element with business language, and linking back to the official Mermaid syntax page when advanced syntax is required.
Production Checklist
Before publishing a Mermaid Gitgraph, run through this checklist so the diagram remains useful after the immediate conversation is over.
Production Review Questions
Before shipping the diagram in public docs, compare it against the official syntax page and then ask whether each line helps the reader make a better decision.
Troubleshooting
Most Mermaid issues come from an incorrect declaration, a syntax feature used before the base diagram works, or a diagram that is trying to communicate too many ideas at once.
The diagram does not render
Check that the first line is the correct declaration for Gitgraph: gitGraph. Then remove advanced lines until the smallest version renders.
The diagram renders but is hard to read
Shorten labels, reduce the number of visible items, and split separate ideas into separate diagrams.
The meaning is ambiguous
Add edge labels, relationship names, axis labels, or surrounding explanatory text so readers know what the diagram is proving.
The diagram becomes stale
Prefer stable concepts over volatile implementation details, and add ownership notes when the diagram documents a changing system.
Publishing Notes
For SEO and long-term documentation quality, keep the Mermaid code close to the explanation. Search engines can understand the surrounding text, while engineers can copy the exact syntax into their own editor.
If the diagram is used in a product page, add a short caption that states what decision the diagram supports. If it is used in internal docs, add ownership and update expectations so the diagram does not become stale after the system changes.
Best Practices
- -Use meaningful commit ids.
- -Keep diagrams focused on workflow, not every commit.
- -Show the merge point clearly.
- -Use separate diagrams for complex release trains.
Common Mistakes
- -Trying to mirror the complete repository history.
- -Leaving branch switches implicit.
- -Using generic commit names everywhere.
Choosing Related Diagram Types
If Gitgraph does not quite match your communication goal, compare it with these nearby Mermaid diagram types.
Timeline
Timeline diagrams explain events in chronological order. They work well for histories, release plans, and incident reports.
Gantt Chart
Gantt charts show schedules, task durations, dependencies, and milestones. Use them for lightweight project plans that should live close to documentation.
Flowchart
Flowcharts turn decisions, processes, and branches into readable Mermaid diagrams. They are the best starting point when you need to document a workflow, product funnel, or engineering process.
FAQ
Is Mermaid Gitgraph rendered on the server?
This tutorial page is server-rendered for SEO. The Mermaid syntax is shown as plain text so search engines and readers can inspect it without waiting for client-side rendering.
Can I edit this Gitgraph example?
Yes. Open the Mermaid editor, paste the example, and modify the labels, relationships, or values for your own use case.